button do?
 button do?
 button do?
 How do I publish my public gigs to my Facebook events?

 entry on the top
menu bar for? Why is an RSS feed so cool to have?
button do?
entry on the top
menu bar for? Why is an RSS feed so cool to have?
button do?
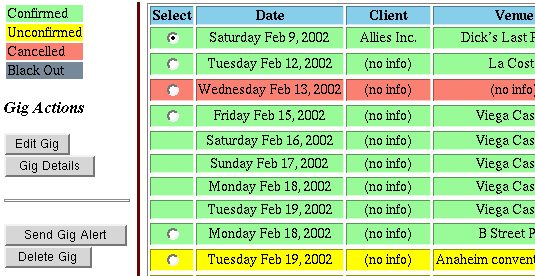
Use this button to update information about a particular gig. For example, if the gig location was unknown when the gig first came in but is now available, you can include the new information through the Edit Gig button.[Top]
- Select the gig you want to update from the gig list
- Press the Edit Gig button
- Make the gig updates
- Press the Save Gig Edits button at the bottom of the Edit Gig form
button do?
This button displays all available information about the selected gig, including gig location map and participating personnel contact information.[Top]
- Select the gig you want to details about
- Press the Gig Details button
- When you are done, press the Return To Gig List button
button do?
This button sends email to all personnel on the gig (who have email addresses). You will be prompted to phone any musicians who have no email. The Gig Alert is useful if[Top]
- Gig information comes in close to the gig and you think members may not check the website.
- Some musicians on the gig don't have access to your site for one reason or another, but do have email.
This is the site that your non-administrative band members see when they log on to your Where's The Gig site. It basically shows them the gig list, gig calendar, and gig details. However, the don't have the ability to modify the gig information or site configuration.[Top]
Because your calendar is disabled. To enable it:[Top]Instructions for providing a link to the calendar page are provided in the section above the checkbox on the Site Configuration page.
- Go to the
page.
- Click on the Public Pages tab.
- Click the Provide a public gig calendar checkbox.
- Click the [Set Public Pages] button.
Because your booking services pages are disabled. To enable it:[Top]Instructions for providing a link to the Booking Services pages are provided in the section next to the checkbox.
- Go to the
- Click on the Public Pages tab.
- Click the Provide client booking page and booking-agent services page checkbox.
- Click the [Set Public Pages] button.
Because your Public Song List page is disabled. To enable it:[Top]Instructions for providing a link to the public song list page are provided in the section above the checkbox on the Site Configuration page.
- Go to the
- Click on the Public Pages tab.
- Click the Provide a public gig calendar checkbox if it is not checked (the p ublic calendar must be enabled to provide the public song list).
- Click the Enable a public songlist checkbox.
- Click the [Set Public Pages] button.
Templates are useful when you often perform at the same location. A template contains most of the information that goes into the gig form, except for the gig date and status. So, for example, if your band tends to rotate through four or five clubs, creating a template for each club makes it really easy to add your gigs. Instead of typing in the sound check, gig times, dress, etc. you just select the template and all of the information is filled in for you.[Top]Insta-Template Instructions:
If you have already entered information for some past gig that you would now like to use as a template
- Go to the gig you want to use by using the gig list on the
page.
- Select the gig.
- Click the edit icon (pencil).
- When the gig information is displayed, Press the [New Template] button.
- The information from the [Edit Gig] form will now fill in the template entries.
- Enter a Template Name.
- Click the [Add Template] button at the form bottom.
A Black Out date is useful if you want to flag a date when your band can't do a gig. This can happen if a key band member will be out of town or otherwise unavailable, or if the band will be on travel to an out-of-town gig.[Top]If you try and add a gig on a blacked out date you will receive an error message. Likewise, if you try to black out a date that has a gig on it you will also receive an error message.
Band members can let you know about any unavailable dates by using the Set My Blackouts page (available both on the administration and band members' pages). If you book a gig with an unavailable band member a warning will be displayed so you'll know to either not book the gig (yeah, right) or get a replacement player (more likely), or just do the gig without them and make more money per player (most likely).[Top]Features:
- Check availablility right on your gig form: Set the gig date and then click the personnel icon (
) to get a list of any conflicts.
- Easy calendar-based checkboxes for rapid date entry.
- Members can add comments to let you know when during the day they are not available.
- Blackout comments are added on the "List All My Blackout Days" page on the "Set My Blackouts" tab.
- Warnings displayed if a blackout date coincides with a booking.
- Convenient listing of all members' unavailable dates on the Administration site.
- Blackouts shown on JavaScript-based calendar along with gigs to assist with planning.
- You (or the person with the administration email account) will be notified by email when a band member modifies their blackout dates.
How to enable Personnel Blackouts:
- Easy part: Associate personnel with their login name.
- Go to the Review/Edit Personnel page.
- Select a band member from the list.
- Click the [Edit] button on the page bottom.
- Select their associated Login Name on the form.
- Click the [Save] button on the page bottom.
- Hard part: Make your band members keep their schedule up-to-date.
First, see above about setting up Personnel Blackouts so you have them enabled for yourself. Next:[Top]
- Click the Set My Blackouts tab to display the user blackouts page.
- If you are an administrator, you will see a box with a pair of radio buttons labeled "Me" and "Another Member". Click the "Another Member" option.
- A popup menu will appear with the names of all of your members. Select the member for which you wish to set the blackout dates.
- Click the [Set Member] button next to the popup menu.
- You may now set the blackout dates for the selected member. Blackout dates will be set for this band member until you either select a different member and click the [Set Member] button, or click the "Me" radio button option.
If you want to provide a "Maybe" option to your member blackouts:[Top]
- Click on the "Site Customization" tab.
- On the "Account Options" tab, check the checkbox labeled Members can set "Maybe" for blackouts
- Click the [Set Options] button.
Yes:[Top]Note: Be sure that your default time zone is set correctly, otherwise the ICal entries may be offset in time. How to set your default time zone.
- Click the Set My Blackouts tab.
- Click the List All Personnel Blackout Days link below the navigation tabs.
- Click the link: "Export blackout list to your personal calendar (ICal format)"
- For Google Calendar, the Google Calendar export page provides a checkbox to export member blackouts along with gigs.
WheresTheGig will automatically, once a day, send out an email with a list of all modified gigs. The list of gigs is sent to any band members that are assigned to the gig, and band members are sent a list of only the gigs they are assigned to. Needless to say (but I'll say anyway), the emails will only be sent to band members that have email addresses included in their personnel information.[Top]
Here's how you do it:This is a nice feature, as it keeps band members up-to-date even if they don't have user access to your WheresTheGig account (fill-in musicians, for example). Note: Some ISPs, notably AOL, will "blackhole" mail from WheresTheGig. That is, the mail won't go into any user's folder and also won't get bounced back to WheresTheGig. I suggest you verify that your members are receiving the update emails. If they are having problems you can have them try adding the server "wtg.com" to their email whitelist.
- Click on the "Site Customization" tab.
- Click on the "Account Options" tab.
- In the "Email Schedule Updates" section check the checkbox labeled "Email schedule updates to band members".
- Click the [Set Options] button.
(A screen cast demonstrating this feature is available on the Demo Videos page.)[Top]When this feature is enabled, WheresTheGig will display a list of the potential players on your gigs with a "boilerplate" message requesting their response (that you can modify) that will be emailed to them. Here's an example:
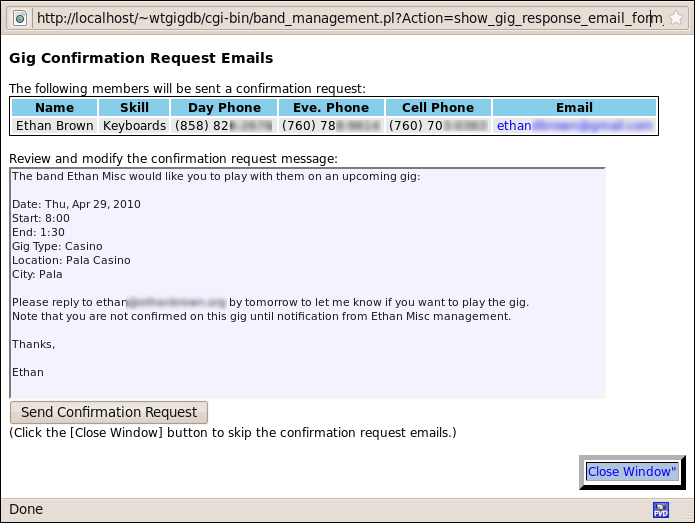
Email will be sent only to players that you specify as described below, so it won't be sent to any of your band members that play most of you gigs (since that would be pointless).
Here's how you do it:The confirmation request email form will now be displayed if any of the selected players for your gig are flagged to receive this mail. Be sure that any players flagged to receive the mail have an email address specified in their personnel information.
- Click on the "Site Customization" tab.
- Click on the "Account Options" tab.
- In the "Enable Member Gig Confirmation Emails" section check the checkbox labeled "Enable send confirmation requests to specified members".
- Click the [Set Options] button.
- Click on the "Review/Edit Personnel" tab.
- Select a player that you want to receive the confirmation request email.
- Click the [Edit Selected Personnel] button.
- At the top of the form, check the checkbox labeled "Send email to member requesting gig assignment confirmation"
- Click the [Save Personnel Edits] button at the form bottom.
Only one confirmation is sent to a player per gig, so even if you update a gig a player will not receive a second email about the same gig. But if you add another player during your update, they will receive the confirmation request email (if they are flagged to, as above).
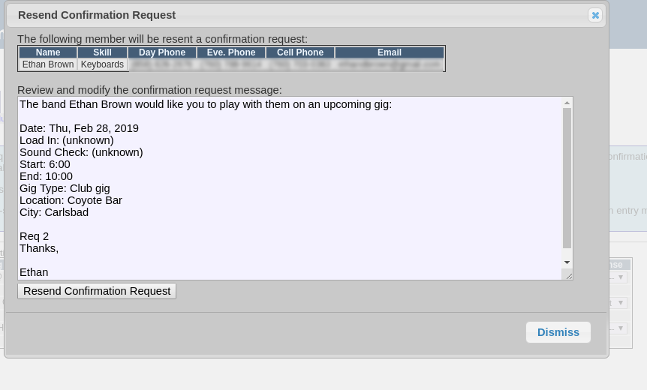
There are two ways to resend a confirmation request:[Top]
- The easy way where the member can respond to either the first request or your resent request.
- The more complicated way where the member can respond ONLY to your resent request.
The Easy Way
If the member has not yet responded to your request, the "Resend Request" will be available in the "Reset Response" menu.A dialog will appear that will allow you to modify the message before you send it.
The More Complicated Way
You can re-submit a confirmation request email to a band member by purging the current confirmation response record for this gig / band member, and then creating a new request. You probably only want to use this method if you don't want the member to be able to respond to your initial request, only to the resent request.
To purge the record:Note: Since the original confirmation response record was purged, the band member will be shown an error if they attempt to respond to the original confirmation request email.
- Click on the "Display Gigs" tab.
- Click on the "Review Confirmation Requests" link on the submenu bar below the tabs.
- In the status table, find the row for the gig and band member for the confirmation request that has been sent previously. If no such row exists, be sure that the instructions above have been followed.
- From the "Reset Response" menu on that row, select the Purge Record option.
- Click on the "Display Gigs" tab.
- Select the gig you want to re-submit to the band member.
- Select the "Edit" icon above the gig table.
- Click the [Save Gig Edits] button at the page bottom (you don't have to make any actual updates to the gig, unless you want to).
- The band member should now appear in the member table on the Confirmation Response page. Click the [Send Confirmation Request] button. The band member will receive a new confirmation request email. If you want to, you can make a note in the confirmation request text region so the member knows this is a re-submission.
The Duration value selection is just to the right of the gig date selection. This is useful if you do multi-night gigs. You just enter the gig once and set the duration, and then the gig shows up on all of the consecutive dates. For example, if you have a 5-nighter from Tuesday through Saturday, just add the gig on the Tuesday and set the duration to 5. This makes it really easy to enter multi-night club gigs, especially if you're using templates.[Top]Gigs with more than 1 day of duration show up slightly differently on the gig lists (like the main admin page). Here's an example. The February 15 gig is a five day duration gig:
- There is only one selection box for a multi-day gig. That is, none of the subsequent days on a multi-day gig have a selection option.
- The multi-day gig only counts as one gig in the gig count at the page top.
- The entire gig duration will show up if any portion of the gig duration is in the time interval shown.
- An additional Through column will show up on the gig detail of a multi-day gig.
Yes! If they're all at one place and you have a template for the gig. Here's how you do it:[Top]
- Click on the New Gig tab.
- Click Add Gigs By Month on the sub-menu (right below the tabs).
- Follow the instructions on that page. They're really easy.
A Rehearsal gigtype is automatically provided on your gig-entry form (like the "Other" gigtype). Rehearsals are special in the following ways:[Top]
- They show up on gig lists in a special font.
- They are color-coded.
- Confirmed rehearsals show up with a special color on the band calendars.
- Rehearsals have a special Gig Details page format.
- Rehearsals never show up on the public calendar.
- Rehearsals never show up on an booking service inquiry.
If you already set your own rehearsal gigtype, I suggest you remove it from your gigtype list.
You can easily use WheresTheGig to organize your rehearsal schedule and provide location and time (of course), but also the agenda, the list of songs to be rehearsed (with links to their mp3s, charts, and lyrics), and the list of members expected to participate in the rehearsal. Here's how you can best use the gig-entry form to specify your rehearsal information:[Top]
- Select "Rehearsal" as the gig type.
- Create a "venue" for your rehearsal location(s), and select the appropriate "venue" for your rehearsal. If you include the address in the venue information then the rehearsal details page will create a map to the rehearsal location. Including the phone and email address for the rehearsal location will also cause these to be printed on the rehearsal details page.
- Set the rehearsal start and end times as the gig start and end times.
- Use the "Additional Gig Information" textfield to provide the rehearsal agenda.
- Select the list of band members from the "Gig Personnel:" list to indicate who needs to be at the rehearsal.
- To provide the songs to be rehearsed along with links to their mp3s, charts, and lyrics, use the "Song/Setlist Management" pages:
- Create a set named "Rehearsal".
- Each rehearsal, assign the rehearsal songs to this set.
- To provide mp3s, charts, and lyrics, fill in the relevant song attributes for the rehearsal songs.
- Enable setlists in the gig information (click here for more information on this).
- Select the "Rehearsal" set from the set selections on the gig entry form.
- To greatly speed up the process of adding a rehearsal to your schedule, create a rehearsal template.
- To enter multiple rehearsals at once, use the "New Gig"->"Add Gigs By Month" page after you've created a rehearsal template. <\ul>
The gig form includes a field in the Additional Gig Information section labeled External Resource URL. You can provide any valid URL to reference a document on a file sharing systems like DropBox.com, Google Drive, and many others. When you provide a URL in this field it will show up as a clickable link on the gig details page and the gig alerts. Your band members can then easily click the link and obtain the file or access the shared folder.[Top]
Yes. WheresTheGig can export your gig information to any "iCalendar" compliant calendar application (such as those listed above).[Top]
(Note: Be sure that your default time zone is set correctly, otherwise the ICal entries may be offset in time. How to set your default time zone.)WheresTheGig allows you to
ICalendar Feed instructions
- Create an ICalendar feed for your local calendar (Preferred Method).
- Update your local calendar with current gig information via file export
- Remove any cancelled or deleted gigs from your local calendar export
Outlook (Microsoft, Mac) file import instructions
Evolution (GNU/Linux, *BSD, UNIX) file import instructions
PDA/Cellphone/Other file import instructions
What does an exported gig look like on your local calendar?
A "summary" will be made for each gig that looks like "Gig: [band name] ([status]) at [venue]". For example:
Gig: The Notones (Confirmed) at The Stale Beer PubThe event description will list much of the gig information (load in, sound check, food, sound lights, etc). Many calendar applications bring up the description by double-clicking the summary, or through a selection on the Right-Click menu.
To have the gig placed in the proper time interval on your calendar, the gig Start and End times must be provided in the proper format. WheresTheGig, like it's author, is fairly simple-minded, and can only understand certain time formats:
Start Time End Time WheresTheGig Thinks You Mean 8:00 10:00 8:00 pm - 10:00 pm 9:00 1:00 9:00 pm - 1:00 am 7:00 pm 11:00 pm 7:00 pm - 11:00 pm 8:00 am 1:00 8:00 am - 1:00 pm 18:00 21:00 6:00 pm - 9:00 pm 800 pm 1100pm Huh? What? About 9 Whenever Huh? What?
You get the idea. If WheresTheGig can't figure out the gig time, it just displays it as an "All Day" event.
ICalendar FeedNOTE: If you export your band member blackout days, be aware that if a member blackout is removed from WheresTheGig it may NOT be automatically removed from your local calendar. You may need to clear your local calendar manually before re-exporting.
- Click on the Export To Calendar link at the top of the page.
- Click on the [Show ICal Feed URL] button to provide a feed for your gig information.
- Click on the [Show Member Blackout ICal Feed URL] button to provide a feed for your band members' blackout dates.
- Copy the URL and paste it into your calendars network calendar configuration field.
Outlook (Microsoft, Mac) instructions:
- Click on the Export To Calendar link at the top of the page.
- Click on the [Update Active Gigs (CSV)] button.
- Save the calendar export file to disk.
- Run Outlook
- Clean out any previously imported WheresTheGig events. If you don't, you'll end up with duplicates. (Skip this section if you have never imported events from WheresTheGig.)
- Select [View]->[Current View]->[Active Appointments]
- Sort by "Subject" by clicking on the heading labeled "Subject".
- All the previously imported events will be grouped, since they all start with Gig: ....
- Select all of the previously imported events (click on the first one and shift-click on the last).
- Press the [Delete] key.
- Select [File]->[Import and Export] from the Outlook menu bar.
- Select Import from another program or file from the action list.
- Select Comma Separated Values (Windows).
- Select the file you just downloaded from WheresTheGig with the file chooser.
- You've already removed all of the gigs from your Outlook calendar, you can ignore the "Do Not Duplicate Items" choice.
- Select Calendar. The gigs will now be imported into Outlook.
Evolution (GNU/Linux, *BSD, UNIX) instructions:
- Click on the
graphic at the top of the page.
- Click on the [Update Active Gigs (Ical)] button to update gig info, or on the [Remove Deleted Gigs] to remove inactive gigs from your calendar.
- Save the calendar export file to disk .
- Run Evolution, show the Calendar view.
- Select [File]->[Import] from the Evolution menu bar.
- Select Import a single file in the Import Wizard.
- Select the downloaded file using the [Browse] button.
- Leave "File type:" selection on "Automatic", click [Forward].
- Click [Import].
- The destination folder "Calendar" should be highlighted. Click [OK].
PDA/Cellphone/Etc instructions:
Most PDAs and cellphones with calendar applications can sync to Outlook. To download the gig information into these devices:
- Follow the instructions for Importing Into Outlook.
- If your device is capable of syncing directly to outlook, the gig data will be installed during the sync process.
- Some devices (such as cellphones) sync to outlook through their desktop client program. Follow the instructions for your particular device.
Note that the calendar synchronization only goes from WheresTheGig to your computer. Any changes you make on your local calendar are not transmitted back to WheresTheGig.
ICal exports will show up shifted in time if your default timezone or venue timezone are set incorrectly. To set your default timezone:[Top]If some of your gigs are still showing up shifted in time, check the venue timezone:
- Click the Site Customization tab.
- Click the Account Options subtab.
- Set the default timezone at the bottom of the form.
- Click the Review/Edit Venues tab.
- Select the venue from the venue list.
- Click the [Edit] button at the page bottom
- Check the venue timezone on the venue information form.
Yes. WheresTheGig will export your gigs to one of your Google subcalendars. Here's how you do it:[Top]
- Create a new calendar in your Google Calendar set. Google Calendar allows you to create separate calendars for separate event types (e.g. family, work, gigs, etc). You must create a specific, separate calendar for each WheresTheGig account you want to synchronize. This is important! WheresTheGig will assume that any events in this Google calendar pertain to your WheresTheGig account giglist. They will be cleared out and replaced with the current state of your WheresTheGig giglist.
- Click on the "Export To Calendar" link at the top of your WheresTheGig account page.
- Click on the Google Calendar logo image
- The first time you access the Google Calendar export you will be directed to Google to grant permission for WheresTheGig to update your calendar.
- The first time you do an export you will select the destination Google subcalendar from your calendar list.
Yes. If you have your "Fan Services" enabled you can provide a link that will export your public gigs in ICal format so that they can be imported directly into your fan's calendars. Your public ICal export link looks like:[Top]
http://WheresTheGig.com/cgi-bin/gig_calendar.pl?account=YOUR_ACCOUNT&Action=export_ical
Replace YOUR_ACCOUNT with your WheresTheGig account name.
Easy:[Top]
- Go to the
page.
- Go to the Changing A Password section.
- Enter the username.
- Enter the new password.
- Re-enter the new password.
- Click the [Change Password] button.
Easy:[Top]
- Go to the
- Go to the Adding Users section.
- Enter the new username.
- Enter the password.
- Re-enter the password.
- If you want this user to have administrative access (the ability to add gigs, delete users, etc.) click the Grant this user administrative access checkbox.
- Click the [Add User] button.
Easy:[Top]
- Go to the
- Go to the Deleting Users, Adding Administrative Access: section.
- Select the user to remove from the Delete General Access To: list.
- Click the [Delete User] button.
Easy:[Top]
- Go to the
- Go to the Deleting Users, Adding Administrative Access: section.
- Select the new administrative user in the Grant Administrative Access To: list.
- Click the [Add Admin User] button.
Easy:[Top]Note that this user will still have general access.
- Go to the
- Go to the Deleting Users, Adding Administrative Access: section.
- Select the user to remove from the Delete Administrative Access To: list.
- Click the [Delete Admin User] button.
To add a new outfit selection:[Top]
- Go to the
- Click the Outfits tab.
- Enter the new outfit in the first available text field.
- Click the [Set Outfits] button.
To remove an outfit selection:[Top]
- Go to the
- Click the Outfits tab.
- Clear the text field containing the outfit to be removed.
- Click the [Set Outfits] button.
To add a new gig-type:[Top]
- Go to the
- Go to the Gig Types section.
- Enter the new gigtype in the first available text field.
- Click the [Set Gigs] button.
To remove a new gig-type:[Top]
- Go to the
- Go to the Gig Types section.
- Clear the text field containing the gig-type to be removed.
- Click the [Set Gigs] button.
You can set your WheresTheGig public page colors and fonts. Here's how:[Top]
- Go to the
- Click the Public Page Styling tab.
- Set the style attributes in the forms provided in that section.
- Click the [Set Style Attributes] button.
Yes you can. If you wish to customize your public pages to a greater extent than the pre-defined customizations described here you can use an external style sheet. Your style sheet's URL is set in the same place as the other customization settings (described here). Note that if you use an external style sheet, its values will supersede the customizations set in the general customization fields described here.[Top]In addition to the standard HTML tag classes, I've set some public elements to have their own specific classes so you can further customize your Look and Feel:
Class Description monthtext The calendar table cells containing the month and year label dayheaders The calendar table cells containing the day-of-week labels publicdate The calendar table cells containing public gigs privatedate The calendar table cells containing private gigs calendartitle Title on calendar and date pages pubdate Date on the public gig list (see here for more on the list format) pubtimes The gig times on the public gig list pubprivate The "Private Event" on the public gig list publicgiglist The top-level class for the public gig list pubcomments The gig comments in the public gig list pre.pub Specific <pre> tag for gig comments in the public gig list pubvenue The venue name in the public gig list table.printsongname Class for the public songlist table div.printsongname Class for the public songlist song name div.printsongartist Class for the public songlist song artist *#songlist_col1 Identifier for public songlist column separator
- It may help you to examine the default style definitions at the top of the public calendar by viewing the HTML source of the page.
- You may need to set the <TD> background and foreground to the same values as <BODY> if you want the calendar and page backgrounds and foregrounds to match.
To display your gigs in a list, rather than a calendar:[Top]
- Go to the
- Click on the Public Pages tab.
- In the "Public Gig Calendar/Songlist Page" section, select the As a listing choice.
- Click the [Set Public Pages] button.
To reset the default country used for gig venues and personnel addresses:[Top]
- Go to the
- Select the Account Options tab.
- Select your new country. (If you don't see your country on this list, just send me a note using the Feedback link and I'll add it in.)
- Click the [Set Options] button.
The easiest way to add personnel is to:[Top]To give the new member access to your Where's The Gig website:
- Go to the
page.
- Click the [New Personnel] button.
- If this member is going to do most of your band's gigs, click the checkbox at the form top. That way they'll be selected by default for gigs.
- Fill in the member's information.
- Click the [Submit Personnel] button.
- Go to the
- Scroll down to the Add User form.
- Give them a username and password. If you wish them to have administrative privileges click the Admin Access checkbox.
- Click the [Add User] button.
There's a way better way:[Top]
- Go to the
- Select the new member
- Click the [Gig Assignment] button.
- Select the gigs you want to assign the new member to.
- Click the [Set Gig Assignment] button at the page bottom.
To modify personnel information:[Top]
- Go to the
- Select the member to update.
- Click the [Edit Selected Personnel] button at the page bottom.
- Modify the member's information.
- Click the [Save Personnel Edits] button at the page bottom.
Yes. You can upload an Excel spreadsheet with your personnel information and create both the band member entry and account login.[Top]
- Click on the
- When the Personnel Information page is shown, click on the Import Personnel Data link on the submenu bar below the navigation tabs.
- Download the sample spreadsheet file provided on the page.
- Copy your personnel information into the file.
- Upload the file.
Where's The Gig can send them email about your scheule through the Automatic Schedule Update Notify feature, and with Gig Alerts.[Top]
- Do not add access for this member, that is, don't give them a username and password.
- Add them to the Personnel roster either during the account setup process or through the
- When a gig is added or modified, email will be sent to any personnel on the gig, whether or not they have Where's The Gig access, when you have Automatic Schedule Update Notification enabled. If you want to send your notifications manually, use the Gig Alert feature.
- Click here for more information on Gig Alerts.
Here's how: (Note that the administration page will always show all gigs. Only non-administrative users will see the restricted gig list.)[Top]
- Be sure to assign members correctly on the gig entry/edit page.
- Associate the band member with their login name. See here for instructions. Account users that are not associated with a band member will see all gigs.
- Go to the
- Click on the Account Options tab.
- In the "Restrict Member Schedules" section, click the Band members see ONLY their gigs checkbox.
- Click the [Set Options] button.
If you want to import only song names this is really easy. Just put your song list in a standard Excel file, with the songs in a single column. For example:[Top]Brown Eyed Girl Old Time Rock & Roll Disco Inferno Super Freak My United States Of WhateverThen
- Go to the
page.
- Click the [Import Songlist] link on the lower navagation bar.
- Enter your song filename into the upload field and click the [Import Songlist] button.
Yes you can:[Top]The following table describes the available attributes:
- Create an Excel file.
- The first line of the file describes the attributes that will be provided for each song. Here's an example first line for uploading the Name, Key, and Duration attributes:
Name | Song_Key | Duration- All the following lines will contain the songlist information, one row per song. Here's an example of the first few lines of a file:
Name                      | Song_Key  |     Duration
Brown Eyed Girl           | G         |    3:45
Muskrat Love              | A         |
What's New, Pussycat?     |           |    3:51
Afternoon Delight         | F         |    3:12
In this example, the duration of Muskrat Love and the key of What's New, Pussycat? are not known, so it's left blank.- Once your file is ready, go to the
- Click the [Import Songlist] link on the lower navagation bar.
- Enter your song filename into the upload field and click the [Import Songlist] button.
- If a song is already in your WheresTheGig list it will be updated with new information from the uploaded file.
- You can download an example songlist to help you to create your own list. (Remove any columns from the sample file that you don't need.)
Attribute Description Name Song Name (e.g. Satisfaction, Achy Breaky Heart) Artist Person or group that did the original (e.g. Rolling Stones) Performer Person that performs the song in your band:"First-Name Last-Name" (e.g. John Smith) Song_Key Song Key (e.g. A, C, Gb) Genre The song type (e.g. Rock, Jazz, Polka) Notes Things to remember, like patch numbers, "breaks in the second chorus", etc. Duration Length of the song (e.g. 3:45, 0:26, 4:33) Tempo The song tempo in Beats Per Minute (bpm) Song_URL The internet address of the mp3 (e.g. www.myhost.com/song.mp3) Lyrics_URL The internet address of the lyrics (e.g. www.myhost.com/lyrics.txt) Chart_URL The internet address of the song chart (e.g. www.myhost.com/chart.txt)
Here are some things that may be of interest that go on behind the scenes during a songfile import:[Top]
- Duplicate songs are removed from the import list. If you have identical song names in your import list, only one will be added. If, for example, you perform Satisfaction by The Rolling Stones, and also the version by Britny Spears, only one version (the last in your list) will be added.
- Songs that are already in your songlist on WheresTheGig will be removed from the import list. This is so if you import your songfile twice by accident you won't have to go through the tedium of deleting the 200 duplicated songs. And you also won't be asking me to do it.
Note: you can add duplicate song names using the regular WheresTheGig [Add Song] function.
- During an advanced import, any Genres in the import file that are not already defined on your WheresTheGig account will automatically be included in your Genre list.
By integrating setlists into your gig information, the sets to be performed at a particular gig will show up on the Gig Details page. Band members can then view the sets in two ways: (1) Set "song information" view provides links to the song mp3, lyrics sheet, and chart. (2) Set "stage" view provides a stage-ready set list with a large font, ready to be printed and taken to the gig.[Top]Your sets will now be displayed for selection on your Add Gig and Edit Gig forms.
- Go to the
- Click the [Set List Options] link on the lower navagation bar.
- Click the checkbox labeled Enable Set List Assignment On Gig Form.
In addition to the song name, the stage set list can also show the song key and the song performer. To configure this:[Top]
- Go to the
- Click the [Set List Options] link on the lower navagation bar.
- Select or de-select the attributes as appropriate to your needs.
Sounds like you need a Clone. Here's how you do it:[Top]
- Go to the
- Select the set you want to copy.
- Click the [Clone Set] button to the left of the sets list.
- The clone will appear in the sets list.
- Select the clone in the set list.
- Click the [Edit Set] button to make your adjustments.
WheresTheGig will display the total time duration of the set on the normal and stage view of the set list only if all of the songs in the set have duration values. This makes sense if you think about it.[Top]
The easiest thing to do is to enable your public song list. See the [Site Configuration] page, "Fan Services" for instructions.[Top]You can also export your songlist in a standard format (CSV) so that it can easily be read by other programs:
- Go to the Song/Setlist Management page.
- Click Song List on the submenu.
- Click the [Export Songlist As CSV] link. Save the file to disk, or open it with the program of your choice.
Yes! Archived sets are still in your account but are not displayed by default on your setlist page.[Top]
- To archive setlists, select the Archive checkboxes in the setlist table and click the [Archive Selected] button.
- To show all of your set lists, click the [Show Archived Lists] button. You can de-archive a list by de-selecting the Archive checkboxes and clicking the [Archive Selected] button.
You can add detailed performance notes such as plain text charts, lyrics, lighting cues, etc. and have them displayed on your mobile device during your performance.[Top]
- Go to your song list page ("Song/Setlist Management") and click on the "Song List" link below the tab bar.
- Select the song.
- Click the [Create /Edit song Details] button.
- Add your notes in the text area.
- Click the [Set Song Detail] or [Show Song Detail] buttons.
- On your mobile setlist (or songlist), click the song to display your notes. You may adjust the text size by clicking the "-" or "+" buttons.
- You may edit the song notes on the mobile version by clicking the "Songs" link at the top of main page, selecting the song, and clicking the [Edit] button when the song notes page is displayed.
The Genre attributes include a setting for public or nonpublic. Any song assigned to a Genre that has been set to nonpublic will not show up on your public song list.[Top]
If you have administrative access to another WheresTheGig account, you can copy the venues from that account into your new account. This is an especially nice feature if you manage more than one band and book many of your bands into the same venues.[Top]Don't worry about duplicate entries. The venue import won't import a venue with the same name as an existing venue in your current list.
- Click on the Review/Edit Venues tab.
- Click the Import Venues From Other Account link on the navigation tabs submenu.
- Follow the easy instructions.
A few WheresTheGig users that access the site through AOL have reported that the AOL browser attempts to "save to disk" rather than displaying a page. They also report that using Internet Explorer (or another regular browser [I personally recommend Mozilla]) loads the page correctly.[Top]I can only guess (since I don't use AOL) that this problem is a result of the AOL browser using the file extension (.pl) to identify the file type, instead of the "Content-Type" header value which provides the MIME type of the incoming file. This is pretty broken behavior (on the part of AOL). In short, just use a regular browser if the AOL one is giving you grief.
Probably. Click on the Export To Calendar link at the top of the page and see if the site is one of the export options.[Top]
Note! WheresTheGig will use the gig time and venue address from the information you entered into your site. If you didn't include the venue information it will show up as blank on the exported CSV file. You'll likely have to fill these values in by hand to have Sonicbids or ReverbNation accept your file. But if you provide all this information in WheresTheGig you won't have to do the extra work.
WheresTheGig will automatic publish your public gigs to your Twitter feed. You can also send a gig tweet manually.[Top]Here's how you do it:
- Go to the Calendar Export page by clicking the link at the very top of the page.
- Click the Twitter logo.
- The Twitter export page will be shown. On your first visit you'll be directed to Twitter to provide permission for WheresTheGig to post tweets for you.
- Follow the simple instructions on the Twitter export page.
How do I publish my public gigs to my Facebook events?
WheresTheGig used to interact very nicely with the Facebook Events system, but unfortunately Facebook disabled this feature so now information must be posted to your timeline.[Top]A really simple way to do this is to copy and paste your public calendar link to your timeline. Alternatively you can post an image of your upcoming gigs to your timeline.
Here's how you do it:
- Go to the Calendar Export page by clicking the link at the very top of the page.
- Click the Facebook logo.
- The Facebook export page will be shown. You will need to be logged in to facebook. If you're not, click the [Login] button on the Facebook export page.
- The Facebook export is a "Facebook App", so you will need to grant it permission to create Facebook events in your account. Do this by clicking the [Login] button on the Facebook export page.
- Follow the simple instructions on the Facebook export page.
- Note: You can customize the image colors as described below in the MySpace section.
The answer is "Yes". Here's how it works: WheresTheGig will create a graphic image that looks like a list of your upcoming gigs. You wrap the image in a link so that when people click on the image, it brings them to your public calendar, and they can see all of your gig details. The image is synchronized to your schedule every few minutes and so reflects your current public schedule. Note that this has *no* affect on your band's event schedule that is stored within the MySpace system itself.[Top]Here's how you do it:
The process that updates your image schedule runs periodically, so it may take a few minutes before your image is created and available.
- Go to the Site Customization page.
- Click the MySpace Schedule Colors tab.
- Check the checkbox to enable your image calendar. You can also customize the image colors to match your MySpace page.
- Click the [Set Image Colors] button.
- Go to the Calendar Export page by clicking the link at the very top of the page.
- Copy the HTML in the MySpace section of the Calendar Export page.
- Go to your MySpace account, edit your profile, and paste the HTML you just copied into your MySpace profile content. The image with your schedule will now show up in your profile.
Where's The Gig provides XML and JSON exporting functions so that other websites or programs can easily access your public information. The information that is exported is similar to the information listed on your public calendar, no band-private information is sent. Note that the XML export will only work if you have your public calendar enabled. See this for information on enabling your public calendar.[Top]The XML export is obtained through the same URL as your public calendar, with an additional Action=export_xml parameter. For example, the demo account XML URL is
http://www.wheresthegig.com/cgi-bin/gig_calendar.pl?account=demo&Action=export_xmlYou band's URL would behttp://www.wheresthegig.com/cgi-bin/gig_calendar.pl?account=[your-account-name]&Action=export_xmlTo export your information as JSON just replace "export_xml" with "export_json" above.
entry on the top
menu bar for? Why is an RSS feed so cool to have?
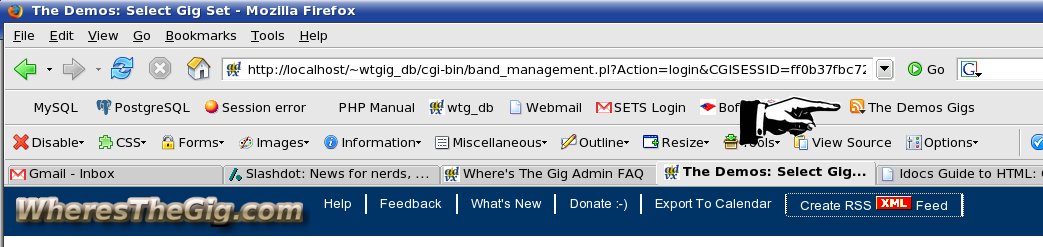
To the point: You can have your gig schedule show up automatically in your browser, with links to the gig details. RSS stands for Real Simple Syndication (*), and you can do lots of really cool things with it. It's often used by news sites and bloggers to distribute links to new content. "So why should I care?" Answer: Most reasonable browsers are "RSS Aware", meaning that you can register an RSS feed and the current gig schedule will automatically show up in your browser. The following is an example of setting up a WheresTheGig RSS feed with Firefox (free) version 1.5. The details may differ for your browser.[Top]
- Click on the
will appear in the browser's address bar (what the hand is pointing at):
If you don't see the RSS icon, click the link that says "click this link to show the RSS page" to display the RSS page. Some browsers will then provide a bookmark menu for assigning the RSS feed.
- When you click on the icon
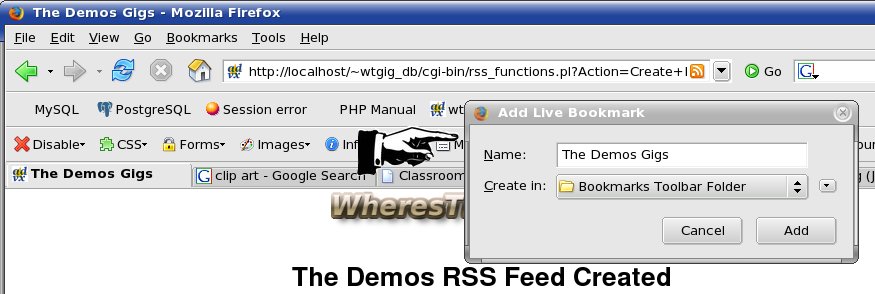
- Assigning the bookmark to the "Bookmark Toolbar Folder" is useful, because your gig schedule will appear right on the browser toolbar:
- Now when you click on your toolbar entry, you'll see your gig list. Selecting a gig from the list will bring you straight to the gig details page:
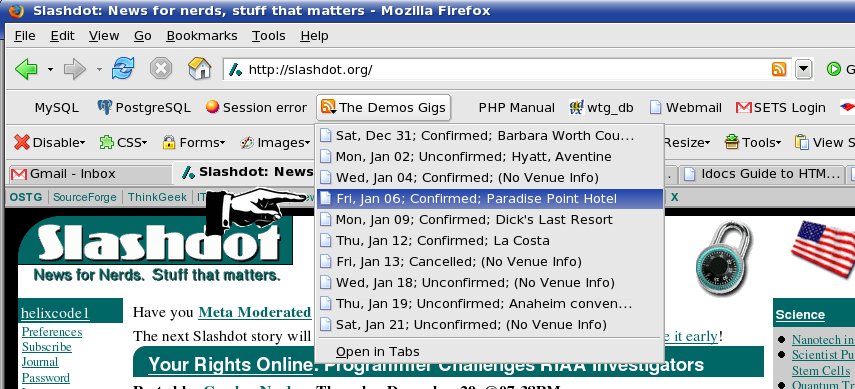
- That's it.
(*) There is some controversy about what RSS stands for. Google if you want more info about this.
Here's one. Just select all the text in this textfield and paste it into your page: will display:[Top]

On the main page look for the link Compute Gig Mileage below the navigation bar. Set the time interval and your home address in the form and click the [Get Gig Mileage] button. Some things to be aware of:[Top]
- Users must be associated with band personnel, just like the Personnel Black Outs. See that FAQ entry for instructions on how to make the user / personnel associations.
- You must verify that the mileages are correct before using the mileage in any important documents. The mileages are computed based on your home and venue addresses using Google's Map API, and errors are not unheard of.
- If any errors occur during the mileage computation then the gig mileage will be set to "0". You can either correct the problem, if possible, or just enter the mileage value manually and click the [Recompute] button at the page bottom to recompute your mileage totals.
- Non-US users: This feature probably won't work for you. If you'd like it to let me know and I'll put in the effort to try to get it working for non-US addresses.
- If you get a Google Error saying something like:
The given key has gone over the requests limit...then retry by clicking the [Get Gig Mileage] button again. If the problem persists, let me know.
Yes. The Multi Account features are very convenient. You can associate yourself with any account for which you have login access. Instructions:
- The multi-account features are controlled using the " Multi Accounts View" link on the lower navigation bar of the "Display Gigs" tab.
- Add account associations using the "Add account" panel.
- To show all gigs from associated accounts, click the [Enable Multi Account Gig Display] button.
- To disable the multi account gig display, click the [Disable Multi Account Gig Display] button.
- To switch accounts, select the account from the associated accounts list and click the [Set Current Active Account] button. This is much more convenient than logging off of one account and logging back in.
- You can only take actions (e.g. edit, delete, details, etc) on Active Account gigs. Gigs from associated accounts will have their summary displayed in the gig list.
- In the calendar view, associated account gigs will show up as the account name in parenthesis. Clicking on the calendar entry will show the gig summary to the right of the calendar. No actions can be taken on associated account gigs.
- If you want to take an action on a gig from a different account, use the "Multi Accounts View" page to switch to the appropriate active account.